Critical Reflection on MEDA302 Work

Project Statement:

Title: A Million Whispers

Artist: Kate Bennett (4981042)

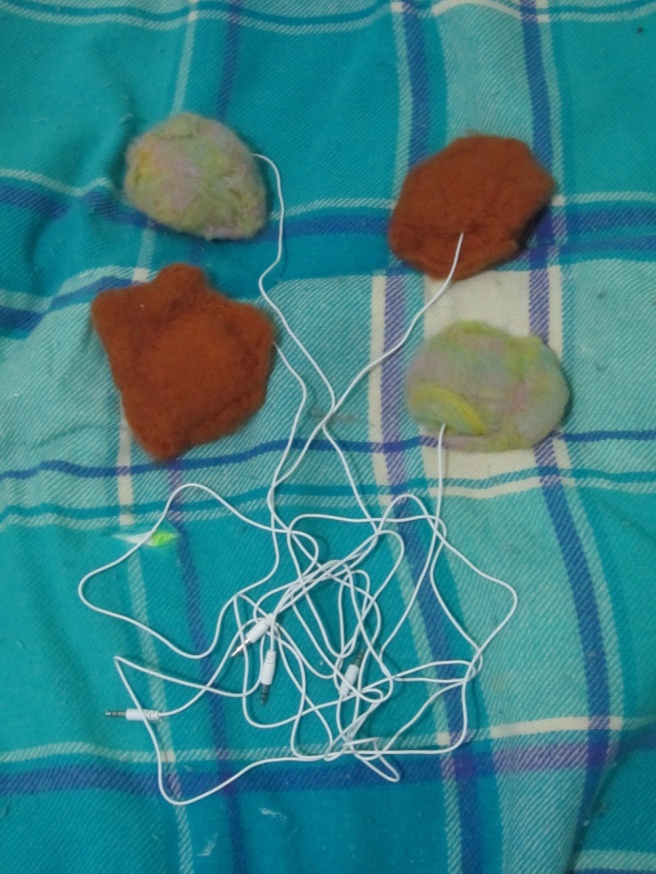
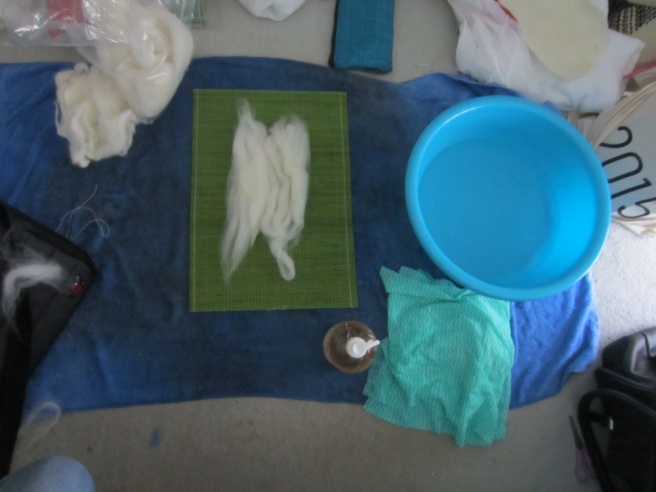
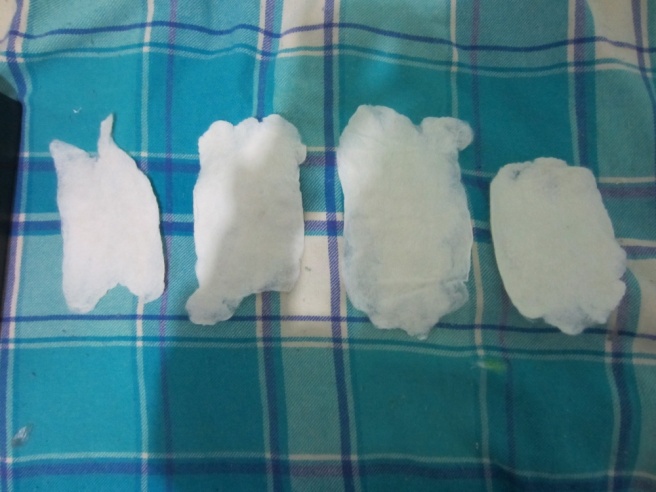
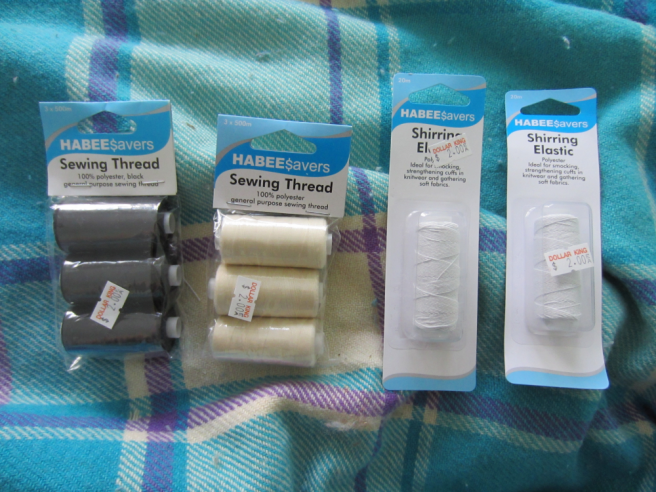
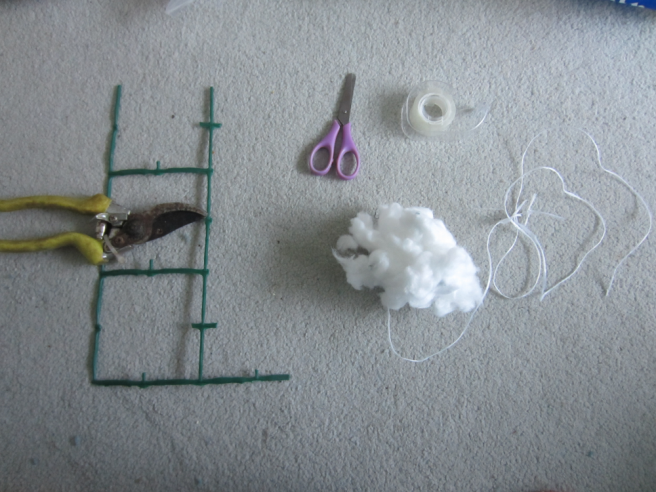
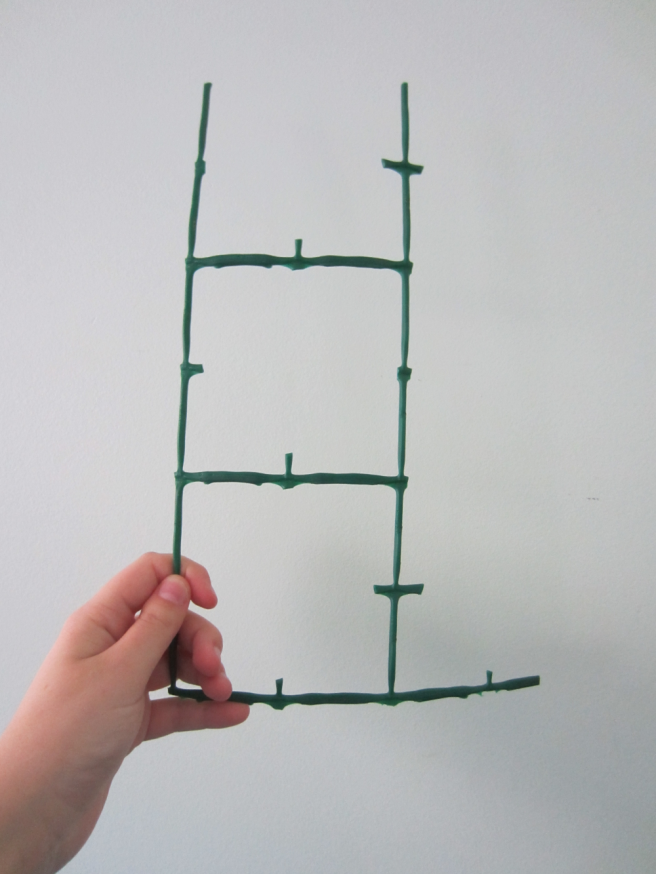
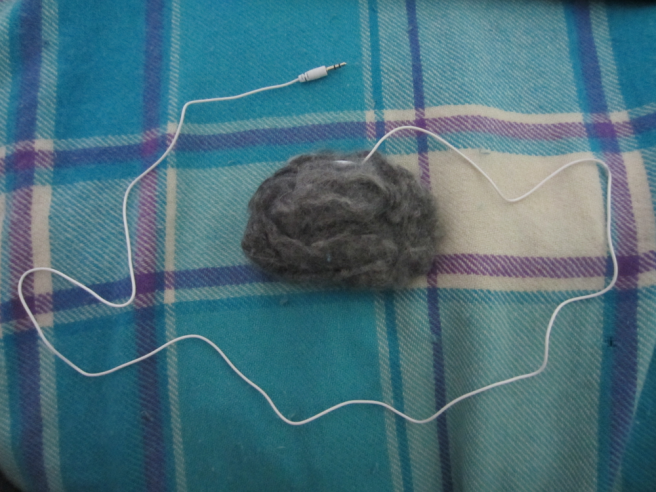
Materials: Cotton wool, felting wool, shirring elastic, cotton buds, LED lights.

Human beings are a work in progress that mistakenly think they’re finished.” – Dan Gilbert.

This work explores the ongoing development of unspoken ideas and investigates how these ideas have the potential to change the future. From personal growth to technological advancements, every new route that is built within the future starts with a hidden insight that quietly appears within the mind and develops into a recognizable object that is found within the physical world.

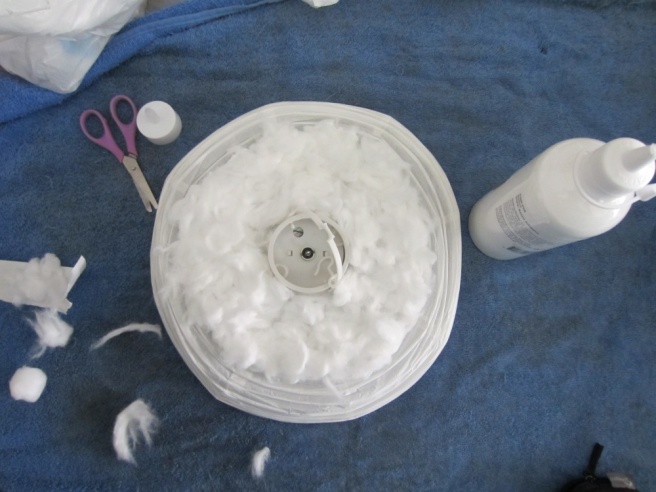
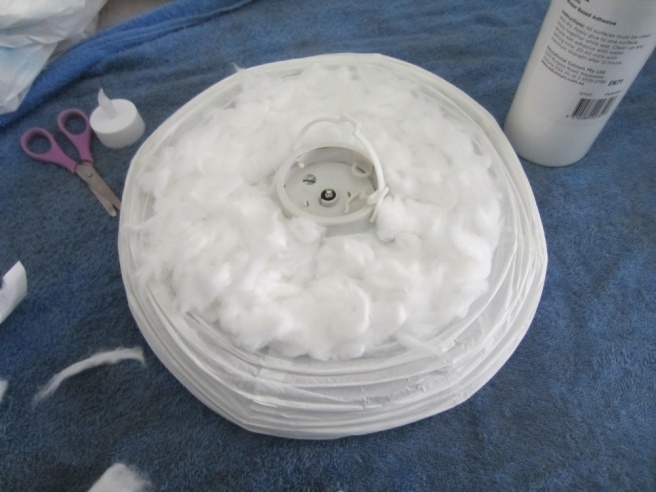
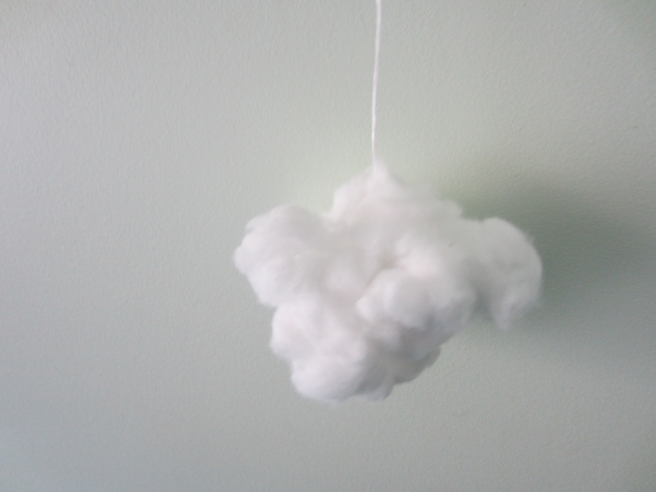
The clouds are set up to signify that the future is still in the process of development, representing the series of thoughts that initiate the creation of this future. Hung up from the ceiling like lightbulbs, these cotton and felted clouds will flicker when hidden ideas begin to develop.

But while human beings have control over how these ideas are conceptualised and brought into the physical world, there is no set prediction that outlines how successful these plans will be within the future. All we can do is take the first step, initiate these plans and hope for the best.

Critical Reflection:

Overall, I have mixed feelings about the project that I had created for MEDA302.

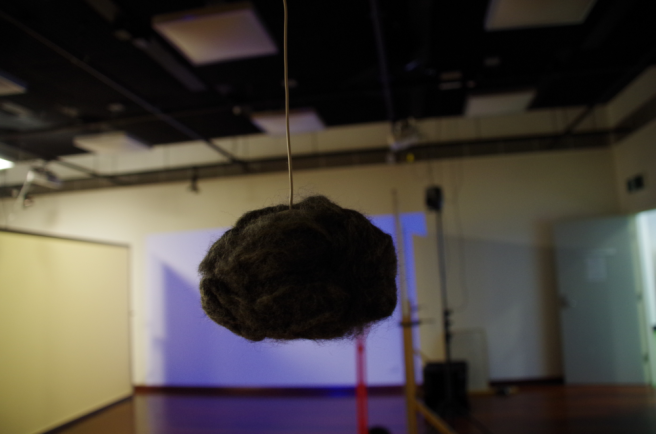
Unlike last semester, there are some material improvements that exist within my work. I successfully understood the process of creating clouds using cotton and felted wool, and the addition of the LED lights inside these clouds gave them a nice aesthetic quality that would look best in dimmed setting. The conceptualisation behind my piece was also somewhat relevant considering that my work had an ‘incomplete’ look to it, even though some of the concepts discussed in previous entries were altered at the last minute.

Yet, to be honest, I’m not entirely confident in the final product of the work. The set-up of my work was mostly improvised, and I should have spent more time planning out the overall structure of my piece throughout the semester whilst I was focusing on material research. There were also some issues with my installed work that made it look like it was incomplete, and I only noticed these problems when I didn’t have enough time to fix them. I saw that the positioning of my clouds was too low in some areas, the shapes of my felted clouds were oddly rigid, and the cool lighting within the larger cloud creates an unnecessary contrast between the warmer colours of the piece.

Although, when presenting my work to Mat and Jo, I was oddly surprised to hear that my work looked decent in the state it was in. The main feedback that I received was that the contextualization behind my work was not being communicated in my final piece, and they said that this issue could be resolved by including more clouds to my piece while adding some hidden speakers around it. Mat also agreed that the contrast between the lights was a bit distracting. But overall, I was quite relieved to hear that my work wasn’t as clumsy as I thought it was, and I will definitely keep these suggestions mind as I continue to work on my final piece for the Grad Show.

Exam Week Two: More Installation and Conceptualisation

Installation Period:

After hanging up the cotton clouds last week, it was time to hang up the felted clouds. This period was a lot more relaxed than last week, as there were less people within the gallery space and less clouds that needed to be hung up. I was able to get Glenn to assist me with hanging the clouds up this time, which made the installation process a little bit easier to deal with.

But because of the heavy contrast between the speaker cords and extension cords, I decided to leave the audio components out of my final work because it would cause the work to look more ‘unfinished’ than it needs to be. It’s one thing to present an ‘unfinished’ look for my work to signify that the new ideas that will be brought into the future are still being constructed by an unknown set of individuals, but leaving the cords in the work would have been a little bit too much.

Conceptual Research:

Because the audio component was removed at the last minute in an effort to simplify the aesthetic presentation of my project, I thought it was necessary to re-contextualise my work to accompany these changes.

After thinking about the future for some time, I realized that the future is a space of the unknown. Unlike the past and the present, the future is not a concrete concept that most people are able to clearly articulate as the events of the future are still considered to be abstract ideas. The clouds have been separated apart from each other in response to the quote by Dan Gilbert that was posted in week two’s entry:

Human beings are a work in progress that mistakenly think they’re finished.

Clouds themselves are considered to be a ‘work in progress’ as their shapes often change, just like our predictions of the future do. People can only predict how certain aspects of the future will turn out based on the current state of the present. But even then, these predictions would still be considered inaccurate because unexpected situational developments and life events could still take place within the person’s life.

The strict focus on lights reflects these concepts as this emphasises the disconnection between the ideas being developed for the future and the audience members interacting with the work. Nobody knows what kind of ideas may impact the future, but at least subtle predictions can help guide individuals into the state that one hopes the future would be in.

Exam Week One: Material Experiments, Installations and Uncertainties

Material Research:

After the failed experiment with the chicken wire last week, I went ahead and bought a large lantern from the Reject Shop and some craft glue from the Newsagency in response to the video tutorial I had received from Maya in week eight. These materials were certainly a lot easier to work with than the chicken wire was, and I was able to craft together a cirrostratus cloud within a short amount of time.

lantern

lantern2

Unfortunately, the lantern itself didn’t come with batteries so I had to quickly obtain some AAA batteries from Woolworths at the end of the week. I tried to place a LED light candle inside the lantern beforehand to see if that would be a better option, yet the flickering light wasn’t visible from the outside once it was switched on.

Installation Period:

On Friday, I went down to the Innovation Campus to install the cotton clouds I had worked on during the week. A bit of the wool on the lantern had fallen off during the trip there, so I had to re-apply it using the glue stick I used to put the smaller cotton clouds together.

Yet, to put it shortly, installing my work was incredibly stressful. There was a lot of uncertainty on how the clouds should be organised as it wasn’t something I had finalised during my previous iterations. Jo suggested that I should try to randomise the locations of the clouds by tying them onto the grids of the roof instead of just setting them up in a straight line. So I climbed up the larger ladder to tie them despite initial fears I had at first.

Jo also believed that I should’ve used invisible string instead of shirring elastic to give the illusion that the clouds were floating in the sky. This was a good suggestion, but it was a little too late to fix this as the elastic was already tied too deeply inside the cloud’s structure. I showed this to Jo and she saw the issue that was present. Yet she said the use of the elastic still seemed a bit untidy unless I was able to back this decision up with some context. After I gave it a bit of thought, I found that the visibility of the strings furthered the symbolism of ‘ideas’ developing inside patterns of thought as it gave the clouds the appearance of lights hanging from the ceiling. This is particularly evident with the flicker of lights that occurs in the clouds every now and then, which signifies the idea popping into the person’s mind.

But while I was able to accomplish the goals that I needed to do for that day, I still feel a little bit undecided on how my final project will be presented within the gallery space. This is something that I will definitely need to consider when I proceed to install the felted clouds next Monday.

Study Break

One of the first things that I did during the study break was gather a set of additional materials so I had enough resources to work with. One of my felting needles had broken itself during the week, so I had to go back down to Spotlight to collect some additional needles. I also bought different colours of felting wool so I could save some extra time while I was there.

In response to the successful iteration in week ten, I also bought some extra pillow speakers off eBay ahead of time so I could finish off the felted clouds I had been working on:

rainbow

Material Research:

Throughout this week, I also did some brief experiments with wet felting and chicken wire modelling to confirm that these were the appropriate methods that I should use for my final piece.

After briefly playing with the wires, I quickly realized that working with chicken wire was a rather challenging procedure. The roll was hard to unwrap as the wire kept tangling itself up. The gloves that I had been using were also too thick and cushy, as I could barely tie the wires together to secure the model I was making. I experimented with the chicken wire for a good couple of hours before I decided to give up on this method and look into using other materials.

IMG_5607

Finding the equipment for wet felting was also tricky. I was able to spot the olive oil soap at the Chemist Warehouse. But as I searched through Wollongong Central and Stockland Shellharbour, I found myself being redirected to different shops when I asked the store workers whether they had bamboo mats or nylon netting. Yet, right before I was about to give up, I spotted a set of green bamboo mats at Harris Scarfe and I bought them for eleven dollars.


Once I had gotten started on the actual procedure of wet felting itself, I discovered that this process was surprisingly easy to work with. There were cloth wipes that I found in the laundry room which served as an appropriate replacement for nylon netting, and the olive oil wasn’t as sudsy like I had expected it to be. I used a small clump of white felting wool to make sure that I understood the process shown in the tutorial that I had found last week.

felt

I failed to create a successful felt at first. I didn’t place any water on top of the cloth wipes before applying soap to it, which left the wool in a fluffy mess when I tried to flatten it out using the bamboo mat. But after a few more attempts, I managed to flatten out several felts in no time.

felt2

Week Thirteen: Final Iteration

Iteration:

In the final week of classes, I conducted some final experiments on my clouds to further enhance my material research before the study break approaches.

Using cotton buds, cotton wool and some sticky tape, I attempted to create a flat-looking cirrostratus cloud so I could hang it up in the middle of the gallery space. I stuck the cotton buds together using the sticky tape to create the internal structure of my model, and then I glued the cotton wool onto it to create the fluffy texture.

In the end, this iteration was only halfway decent. I managed to get the overall effect that I wanted, but the process of sticking cotton buds and cotton wool together took far too long than necessary.

After getting some feedback on this iteration, Jo encouraged me to explore the option of using chicken wire again and suggested that I also try to experiment with wet felting as she believes the process is quicker and easier than needle felting. She showed me how to sculpt cloud shapes by tying the ends of the wire I had together, and suggested that I should find some wire with smaller hexagons as they can create stronger models.

Whilst looking on YouTube during class, I found a video tutorial that explores the basics of wet felting to get myself started on understanding the different tools and techniques that are used within this procedure:

I also found a couple of additional tutorials on creating chicken wire models in case I need further assistance with this procedure:

I’ll be experimenting with the methods presented in these tutorials during the break, which will hopefully create some interesting iterations that will be used in my final work.

For the remainder of the class, I wrapped the felting wool around the chicken wire model to get a brief idea on what the final work might look like, and I was pleasantly surprised with the results I was given. Placing the LED lights inside the model gave the cloud a nice glowing effect that gives my work the warmth and friendliness that it needs. But I’m still not sure whether these lights will still be able to glow after the felted wool has been washed, although Jo assured that it will.

Week Twelve: Experiment with Strings

Material Research:

One issue with my project that I have encountered on a weekly basis was the messiness and unreliability of the strings that I was using. As mentioned in previous entries, it’s difficult to control the direction and height of these strings without resorting to cutting up small pieces and sticking them back together. So, I decided to dedicate this lesson towards experimenting with strings to see if I’m able to come up with a better alternative to what I’m using now.

Before class, I bought a full bag of white felting wool based on Jo’s previous suggestions. This was purchased from the Creative Arts block at the main campus, and there was a surprising amount of wool that was available for a very small price. I also bought sewing thread and shirring elastic from The Dollar King at Stockland Shellharbour. These materials were sold at a cheap price and I acquired several packages in differing shades so I had plenty of materials to work with.

b

a

The first thing I did during the lesson was felt the white wool so I had something to hang up on the roof. It gave the same hardened effect that the grey wool had produced, and it was a quick and easy procedure overall.
After I finished felting my tiny little cloud, I decided to work with the shirring elastic to see if I could tie it up onto the roof. It was a thick substance that was easy to maintain control over, and I was able to tie several knots together without encountering any major problems along the way. It’s very likely that I will be using this string in my final project.

On the other hand, the sewing thread was rather difficult to work with because the material was thin and tricky to grasp control over. It was hard to tie a single knot using this string as it kept slipping out of my fingers. Because of the lack of control I had over this string, it’s unlikely that I will be using it in future iterations.

Week Eleven: Structures of Clouds

Iteration:

As the weeks go on by, I’ve noticed that I’m becoming increasingly frustrated with how unreliable the cotton materials are when I’m producing clouds. The cotton wool doesn’t always stick together properly as I’m building the clouds and it also breaks apart at even the slightest touch. So, before I attended class, I found some green fencing wire from the garage at my house and created a series of tiny structures that I could glue the cotton wool onto. This was successful in the most part, yet you could still see bits of green sticking out of the cotton.

1aa


2

3

4

I found that working with poly string is also a nightmarish experience too. It doesn’t allow me to properly position the cloud’s height, as the length of the string gradually increases depending on how high I am willing to climb up the ladder. I also need to use sticky tape to tie the shorter strings together, which makes my work look extremely tacky. So, this is something that I will need to consider for next week.

I was considering working with fishing line and hooks instead, but this may be too hazardous due to the pointy edges that the hooks have. The line itself also has the potential to cut people’s fingers off when they’re attempting to interact with the piece, so it may be best to avoid that option for the time being.

Throughout classes, I’ve also noticed that climbing up the ladder is still a challenge for me as I still have the same fear of heights that I have had since the beginning of the semester. So, during class, I talked to David about my discomfort with the ladders and he could relate to this struggle. He suggested that I should use the bigger ladder when I’m tying the clouds up from the roof as there are more steps that I can use.

Upon receiving feedback for my iteration, Mat believed that the gardening fence wire was too green and suggested that I experiment with 3D printing instead. After a bit of discussion, we agreed to work on creating a triangle shaped print that would be able to fit just inside the cloud. However, the 3D printer couldn’t successfully produce this shape without stopping halfway through the procedure.

Jo believed that chicken wire will work better, just like Glenn had suggested from last week. She told me that I should use gloves if I choose to work with this option though, as the wire can be quite sharp. Although, Mat thinks that working with chicken wire makes a piece look amateurish and suggested that I should consider other measures when structuring my clouds.

Week Ten (B): Managing the Production of our Work

Goals, Milestones, Obstacles & Mitigations, Tasks:

Achieve-Goals

During this week’s lecture, Mat explored the ways in which we can manage the production of our projects better. These methods include setting goals and deadlines, breaking these goals down into little steps so they are more achievable, scraping ideas that are not working and discovering the best procedures that will help us achieve the goals we’ve set out. I’ve listed the goals, milestones, tasks and obstacles that reside with my project so I can get an overview on the process I have made so far:

Goals: The dominant goal that I have with my work is to create a series of clouds that will hang from the ceiling. Some clouds will be large, others will be small. Some will be made of cotton, while others will be felted. The variety of materials and sizes of these clouds will not affect its overall aesthetic of this project, and it will instead look like a semi-realistic and welcoming piece that will attract viewers to explore and interact with the work.

Milestones: To achieve this overall goal, I need to reach a series of material and conceptual milestones. Some of the material milestones that I have reached in the past involve:

  • Creating cotton clouds.
  • Understanding the process of felting.
  • Hanging these clouds up from the roof using string.

The material milestones that I want to reach in the future include:

  • Stabilizing the internal structure of the cotton clouds that I have.
  • Creating larger clouds with cotton and felting wool.
  • Creating sculptures with chicken wire.
  • Creating a larger quantity of clouds to hang from the roof.
  • Gathering felting wool with different colours (white, reddish, rainbow, etc.).

The conceptual milestones I have already reached involve:

  • Gathering notes on the basic cloud types that exist in the world.
  • Writing down notes on possible story ideas for the audio component of this project.
  • Making mind maps on the symbolism of clouds.

The conceptual milestones I want to reach include:

  • Clarify the concepts that are behind my project. (Does this work explore cultural and social norms? Philosophical ideas? Personal feelings and emotions?)
  • Establish a proper relationship between these concepts and the materials that I’m currently using. Find proper reasons to justify this relationship.
  • Narrow down the storytelling ideas that will be used for the audio components of my project.
  • Write down the script and record audio of myself reading/acting it out. Edit the audio together and clean up any background noise that occurs during these recordings.

Tasks: The material milestones can be broken down into smaller and manageable tasks. These tasks include:

  • Looking up tutorials so I can understand the material procedures that I will be working with. These tutorials can come from books, YouTube videos, online articles and blog entries.
  • Entering an iteration process with these materials to ensure that I understand the process of felting, sculpting, gluing, stabilizing, tearing cotton apart, etc. Make small attempts at achieving each of the steps that are shown in the tutorials I’ve gathered.
  • Identifying mistakes that occur during the process and resolving them before they impair the functionality and aesthetic quality of the project. Look up additional tutorials that may assist in resolving these issues.
  • Finalizing the overall aesthetics and functionality of the sculpture/cloud that I’m working on, and carefully store it inside a large or small box so that it can be easily taken into the gallery space on the day I need to set it up.

Obstacles: The main obstacle that I will need to confront is the large amount of material research and experimentation that’s required with the project I’m doing. Material experimentation has always been one of my weakness points, and I’ve had difficulties with it in the previous projects that I’ve worked on in the past. So, to overcome this obstacle, I will be dedicating most of my iterations towards material exploration rather than conceptual research so that the more difficult steps of my project are completed earlier on in the process.

Week Ten (A): A Short Iteration

Iteration:

In this week’s lesson, I brought in the felted cloud that I had composed last week to see if I could hang it up from the ceiling. I consulted Glenn to see if he had any laptops or audio equipment I could use that will help me play sounds through my speakers, and he found a couple of small recorders that nobody else was using.

But before I was able to hang them up, I had to find a quiet place so I could record a few snippets of myself talking into the microphone. This task was quite hard, considering the noise that everyone else was making as they were working on their own iterations. I managed to find a small spot underneath the stairways that was quiet enough, and I was able to get decent audio despite the faint footsteps and talking that occurred in the background. Yet, in the future, I’ll need to record my own audio at home and place it on a thumb drive or an SD card so I’m able to test out the audio elements of my project using higher quality sound.

After I recorded some test audio, I adjusted the volume to around 50% so it could only be heard if someone had pressed their ear to the cloud. Then, Glenn found some extension cords and assisted me with placing the recorders onto the roof so we could finally test this idea out.

IMGP8011

Overall, this was a successful iteration. But I noticed that the contrast between the whiteness of the speaker cords and the blackness of the extension cords could potentially become an aesthetic issue that needs to be fixed in the future. Glenn suggested that I should create a bigger cloud using chicken wire so I can place the recorder and extension cord inside it, which could potentially resolve this issue. It will take a while before I’m able to create a gigantic cloud using those materials, especially since I’m inexperienced with chicken wire. But it’s something I’ll be thinking about in the iterations that will happen in the weeks to come.

Mid-Session Recess: Searching for Equipment and Materials

Material Research:

Although I had to work on a few assessments that were due in the weeks ahead, I decided to spend the break gathering the materials and equipment that were necessary for the next set of iterations that I needed to do.

First off, I bought a couple of pillow speakers from eBay. The seller had told me that the sound was going to be quiet once I had got them, which was a little bit concerning. But as soon as the speakers were delivered to my mailbox, I found that the speakers played audio at a soft volume that was appropriate for my project.

pic1

Felting equipment was a lot more difficult to find, though. The first place I looked was Stockland Shellharbour. I searched through the materials section at Target, the arts and crafts section at Dollar King and the stationery section at K-Mart. Despite asking a few staff members about it, I wasn’t able to find anything related to felting within Stockland. Although eventually, I was able to purchase some felting equipment and materials from Spotlight in Wollongong. I bought a felting mat, some felting wool and a couple of felting needles.

Once I had my felting equipment, I decided to do a couple of felting experiments at home so I could get the hang of the process. Before I began these experiments, I looked up a few tutorials on YouTube that helped me understand the basics of needle felting:

Once I had gotten myself started with these experiments, there were a few pitfalls that I found myself falling into. I had pricked myself with the needle a few times, and was working at an incredibly slow pace. Despite these obstructions, I quickly became adjusted to the routine and was able to create a long scarf that I was able to wrap around my speakers.

I had to place a few more bits of wool to make the felted sculpture look a bit more cloud-shaped, which allowed me to have a decent-looking cloud that I could bring to class next week for experimentation.

pic2